
Today with Howard News anchors Christion and Kayla, you will learn how to take a picture like a professional. The video will go over some basic photography terms and techniques in hopes to encourage students to pick up a camera and capture art. Photography is significant in people’s everyday lives. Photography assists in capturing memories, telling stories, and capturing history. Some terms that are significant for a photographer to learn include aperture, shutter speed, ISO, focal length, depth of field, bokeh, aspect ratio, white balance, exposure, and frames per second. Also, we will be showing you photo proof on how to use each of these tips and techniques. Hope you enjoy and learn a lot from our news forecast.
The Chosen Words that can take you Where a Picture can’t
“A picture may be worth a thousand words, but well-chosen words will take you where pictures never can,” said Penina Sharon. A picture can be simple, but the words chosen can sometimes take a viewer far beyond what they could imagine. For example, sometimes the meaning of a photograph is only occasionally evident, and when a person explains its purpose, it will take the audience on a journey of the piece. The journey includes the process of the photograph. Before you get to going to take the viewer on a journey, there is an art to capturing the perfect picture.
Personal Insight
Before learning about these techniques, I was taking photos to be taking them. I also would sometimes get jealous of the way others’ images will look compared to mine. I later realized that people were paying attention to lighting, angles, and elements within the photograph.
As I started attending Howard University, I began to care more about how I present myself in photos. For example, I wouldn’t say I liked taking pictures of myself because they would come out looking terrible. My skills in the past contributed to my insecurities.
I wasn’t comfortable with my face being on camera at all, even for photos, because I also had terrible acne. However, when I met my friends in my first year, I slowly became more confident in my skin, which contributed to my wanting to be on camera more and learn more about taking photos behind the scenes.
Last week in visual journalism class, we discussed many techniques, tips, and settings when taking pictures. Outside of this course, we have now gotten the chance to experiment further and analyze the meaning of these techniques.
If someone were to ask you, “Why did you take that photo? And what does it mean that it portrays the golden ratio?” These are questions you probably will say “I don’t know” to, but that’s why I’m here to teach you. A look into my photography journey will encourage you to try photography.
1. Diagonals and Triangles
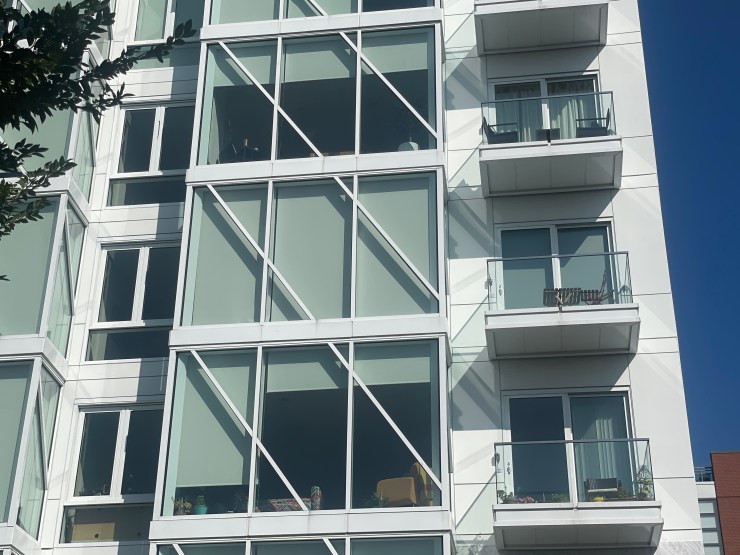
Location: Aperture Apartment Complex | 923 V Street NW | Washington, DC 20001
Diagonals and triangles are techniques that add dynamic tension, implying an image’s strength, serenity, and stability. The use of diagonals and triangles also shows a sense of movement, directing the audience’s eye to the main subject in the photograph. In addition, my goal was to show how the diagonal lines create triangles inside the shape of the windows.
2. Juxtaposition
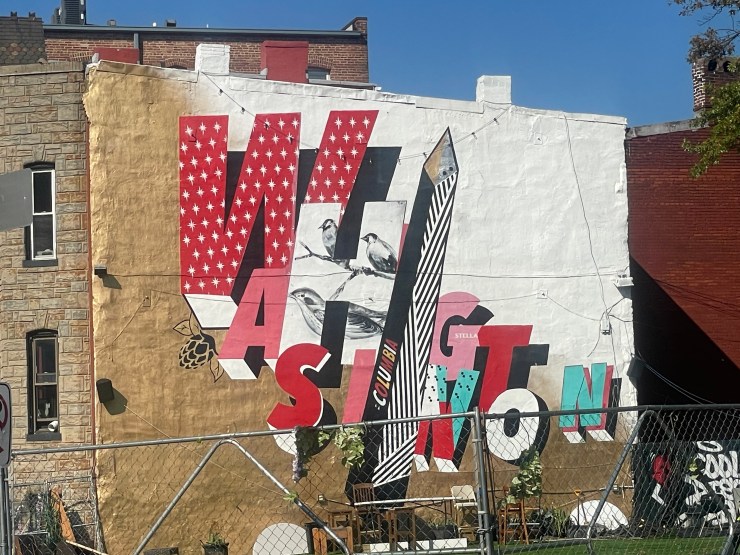
Location: T St NW, Washington, DC 20001
Juxtaposition refers to two or three elements within a photograph complementing or contracting with each other. For example, juxtaposition can apply to the environment and structure. This photograph serves as a peer example of loudness while using juxtaposition.
The colors complement each other because the primary theme color is white, and there are many tints of different colors. The sizing and design of each letter contrast with each other. For example, some letters have a star design or solid color, while another has a bird painting on a branch inside. The sizing is a mix of large and medium letters.
3. Fill the Frame
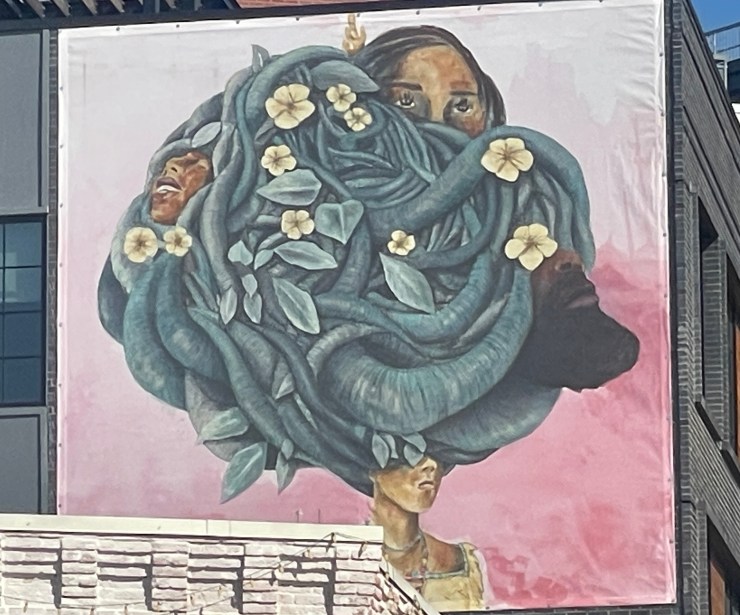
Location: V Street NW | Washington, DC 20001
Filling the Frame technique leaves no space around it, which helps the viewer focus entirely on the main subject. This technique also allows the audience to see details of a photo that they wouldn’t have been able to see from a farther distance. For example, audience members can miss essential information within an image.
However, my goal was for the painting to fill the frame so that the audience could analyze the details of it further. Capturing this image to fill the frame was hard because it was not at my eye level on a building where some other buildings were blocking it.
4. Shoot from Below

Location: Atlantic Plumbing | 2112 8th St NW, Washington, DC 20001
Shoot from below is a technique where the photographer gets down low to create a sense of point of view, making the image more dynamic. This technique can also cause the subject to appear larger than life, implying the subject’s power. In addition, my goal was to make the image look more dynamic by showing it from the point of view of a person looking up.
5. Patterns and Textures
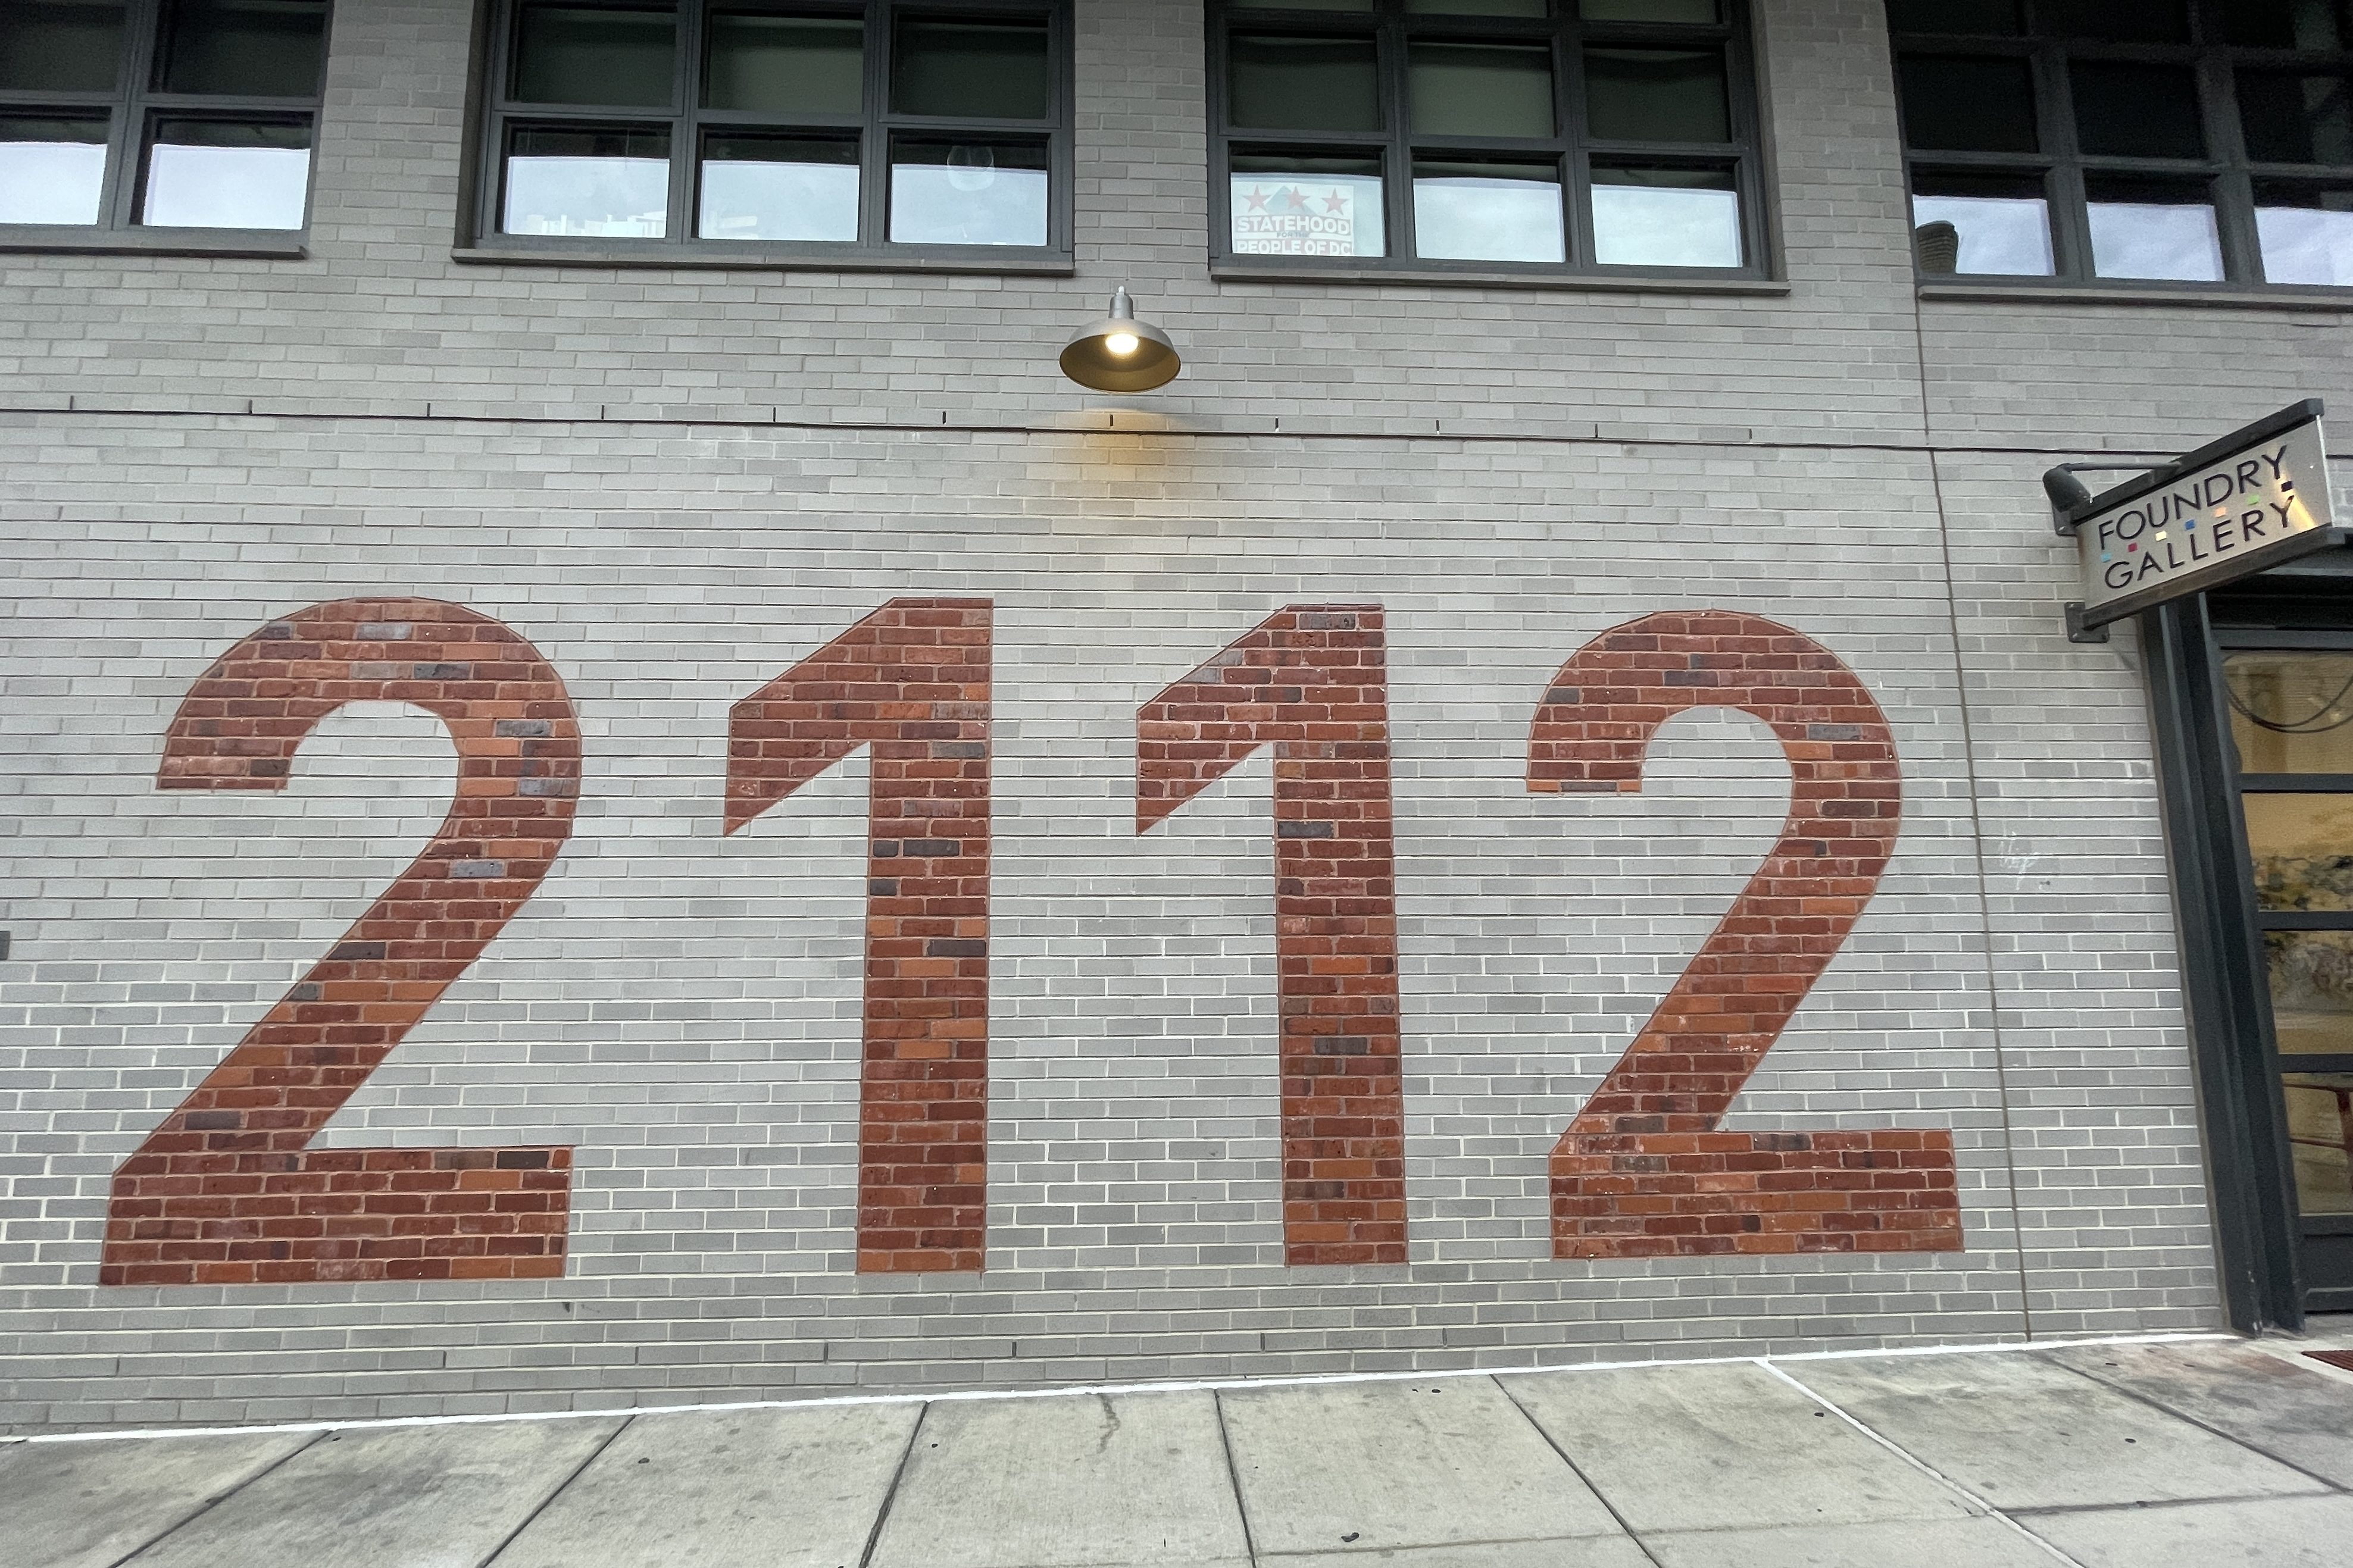
Location: Atlantic Plumbing | 2112 8th St NW, Washington, DC 20001
Patterns easily catch a person’s eye. Patterns and textures are techniques where a photo shows harmony by repeating certain design elements. The patterns include hand-made ones like a series of colors or natural ones like the leaves of a plant. However, I aimed to capture the shades and brown tints used to make 2112 stand out.
6. Leave Negative Space
Location: T St NW, Washington, DC 20001
Leaving Negative Space is a technique where you leave much negative space to make your subject more attractive. This technique also creates a sense of simplicity within the photo. For example, leaving negative space can also help a person focus on the subject. Additionally, my goal was to have my subject and a significant amount of negative space to add to the scenery of the subject, which also was hard to do with the angle I took it.
In conclusion, when a person knows some photography techniques, they can analyze the meaning behind the photograph more. The best techniques that help people identify the purpose include diagonals and triangles, juxtaposition, filling the frame, shooting from below, patterns and textures, and leaving negative space. Each technique enhances a photograph’s meaning by sparking interest in the subject. Last but not least, grab a camera and start practicing today.
